Yeah, they're probably right. However, I decided it'd be a good idea to try and put together a simple tutorial for Gimp that might help overcome the learning barrier, so... here goes. I'm not going to cover the basic installation; there are tutorials around for that. Instead, I'll assume you have Gimp up and running. I also assume you have some geomorph images to play around with.
For this tutorial, I'm using some random Dungeons in Blue tiles from the Tile of the Week set. These tiles are 1000 to 2000 pixels wide and tall and use 100 pixels per square.
Controls
Gimp has a lot of controls, tools, and windows and has two primary operating modes, windowed and single-window. Windowed mode breaks all the tool windows out as completely separate displays, while single-window mode drops them all around the edges of your image. You'll have to figure out which works best for you. Gimp also has a standard menu bar and right-click context menus that provide access to many useful functions.
Here's a summary of the tools and functions you'll need to find for this tutorial:
- The Toolbox Window - This gives you access to basic drawing tools and tool settings.
- The Layer Window - Layers are like separate sheets of paper overlaid on top of your image. You can make changes to any one layer without affecting the others.
- The File Menu - Basic file operations, including the important "Open as Layer" and "Export" options.
- The Window Menu - This gives you access to all the various tool windows. It's handy for reopening windows if you accidentally close them.
- The Image Menu - Grid control and image size control.
- View Menu - Turn grid snap off or on.
- The Layer Menu - Flip and rotate layers.
Got all that? Good, let's get going.
Your First Map
 |
| A new map! |
Choosing a multiple of 2000 for the vertical/horizontal sizes will make it easy to fill the map with geomorphs.
Griddy
Before we go on, let's set up our grid and grid snap using the Image/Configure Grid menu entry. I'm going to set Spacing to 100 pixels so it matches my geomorphs, and I'm going to set the Offset to 0, so the grid aligns with the image edges. You may want to mess with the foreground color to find one that works with your geomorphs too. Click OK when you're done.
 |
| Grid settings |
Next, go to View/Snap to Grid and make sure the menu entry is checked (on). This will force geomorph tiles to snap to grid lines, making it easy to create a nicely aligned map.
Get to Mapping
Let's import some tiles. Use the File/Open as Layers menu option, which opens a fairly typical file navigation dialog. Find your tiles and select them in the dialog (you can use standard ctrl-click and shift-click to select multiple tiles at once), hit OK and wait a bit. You should now see each of the geomorphs you imported in a separate layer in the Layer Window. Note that they retain their names so you can track which piece is which. You'll also see one layer has a highlight around it, which indicates its the active layer.
Head to the Toolbox Window and find the Move Tool. It looks like a little blue cross with arrows on all four arms. Select it, and in the Tool Options pick the Move Layer icon and choose the Move the active layer option.
 |
| The Toolbox with the Move tool configured |
That's all there is to it.
OK, not quite. You'll also want to rotate and flip geomorphs to fit them together. To do this, select the layer you want to manipulate in the Layer Window and then go to the Layer/Transform menu entry. Do be aware that flipping vertically or horizontally will mirror any text on the geomorph. You may also find that a layer is obscured by other layers in the canvas. You can use the Layer Window to rearrange the top to bottom layer order. Just drag on a layer and move it to a new position in the stack.
If you're making GM and Player versions of the same map, you can do this either in a single image or in two separate images (the latter is probably easier to keep organized). Just import the appropriate versions of each geomorph into each image and arrange in the same way.
If you want to do it all in one image, you can use the little eye icon in the layer list to hide or show individual layers.
Now, that's all there is to it. Go ahead and get your map in order and we'll move on to...
Export!
When you use the File/Save menu option, Gimp saves your image as an XCF file. It's good practice to keep these files since they retain the layer information and allow further editing. It's not useful for VTTs though. To create your VTT map, you'll want to use the File/Export menu option to save your map as a JPG, BMP or PNG image (the most commonly supported VTT formats). You can either use the pull-down list to choose an image format or spell out the appropriate extension and let Gimp figure out the right format. When exporting PNG files you can crank up the compression all the way, since it is lossless. If space is a concern, JPG usually produces smaller files when you lower image quality, but it may cause artifacts if you go too low.
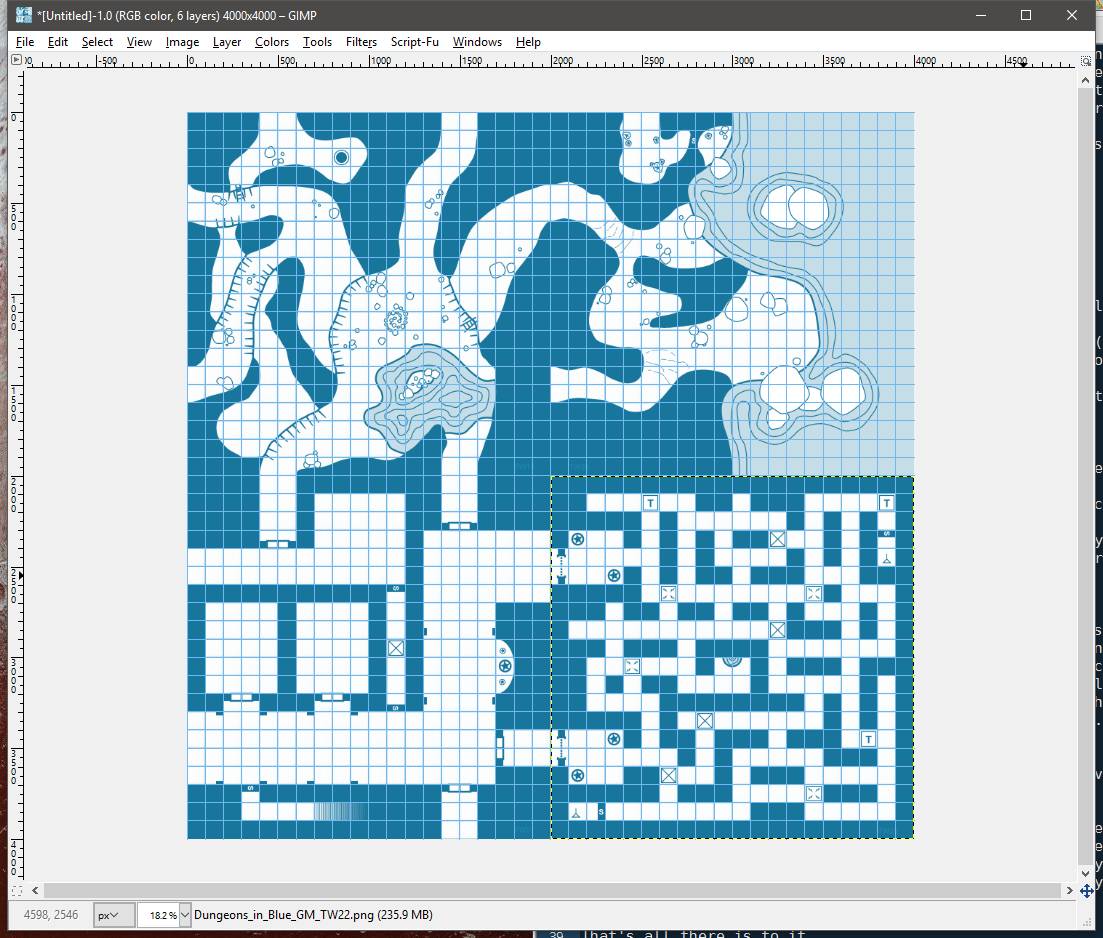 |
| A hasty (not very good) map! |
No comments:
Post a Comment
Note: all comments are moderated to block spammers. Please be polite.